How To Make A Travel Refrigerator

The do-it-yourself fridge is just a travel bag made of thick fabric. Inside it is insulation and “cold accumulators”. The product is conveniently transported in a car when you are traveling on a business trip, on a bus, when you need to refresh yourself during an excursion, and even on the trunk of your favorite mountain bike to arrange a snack with a striking view of the mountain peaks.


Among its obvious advantages are these:


  • compactness. A refrigerator bag will not take up much space and will not be a burden – it is easy to carry even in your hands (which is not the case with an ordinary refrigerator);
  • it does not need electricity. It works completely due to insulation;
  • variability of design and volume. You can choose a travel bag yourself, depending on the volume of transported products and the convenience of carrying;
  • mobility. With the help of a travel refrigerator, you can take it out with you and have a picnic in nature, without losing the benefits of civilization in the form of cold juice, beer, and cool crispy veggies.


And, most importantly, learning how to make a travel refrigerator at home you can save a considerable amount of money. Moreover, it is very simple to make.

Set of tools

Travel Bag Image

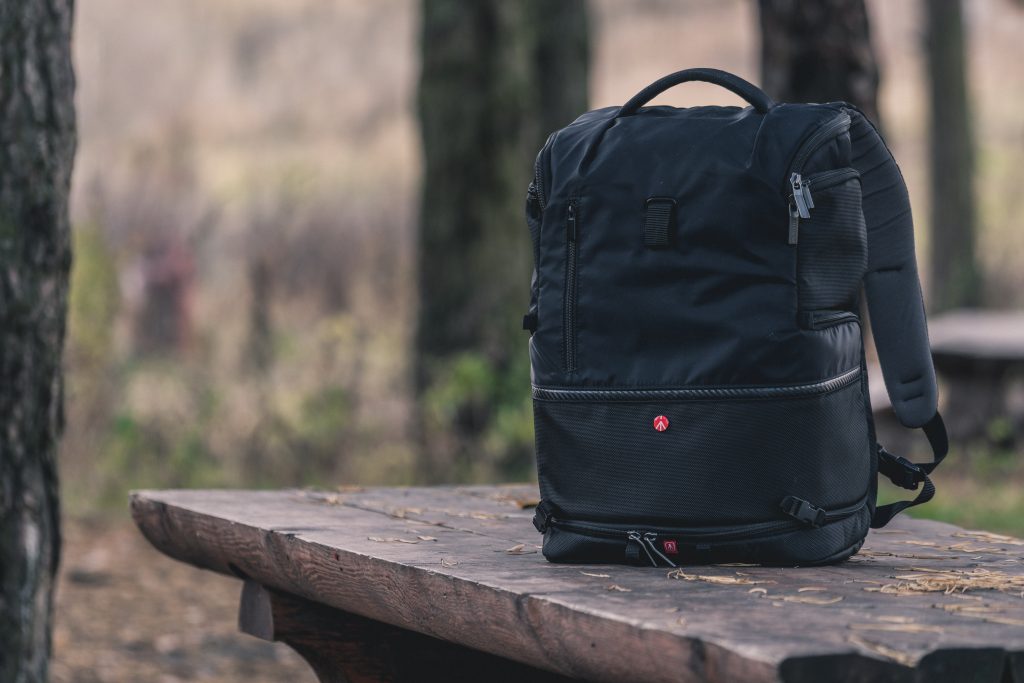
  • Travel bag made of thick material – faux leather, cotton or polyester.
  • Insulation: foamed polyethylene is perfect, covered on one side with a layer of foil. The ideal thickness of the insulation is 5 mm.
  • Wide adhesive tape to fix the insulation;
  • A set of plastic bottles from which we will make a “cold accumulator”;
  • Old newspapers;
  • The freezer of your home refrigerator (you do not need to buy it, just go to the kitchen);
  • Zippers or Velcros. Buttons should be avoided – they are not very tight.


When choosing a bag for a DIY refrigerator, pay attention to its handles. Remember that the handle is the most vulnerable part of the bag. It is the first one to lose its appearance, the first one to break, and is often the root cause for having to say goodbye to a bag. It’s better to ignore bags with rag, wicker and thin handles.


The most comfortable bags are the ones that can be carried on the shoulder. To do this, the manufacturer equips them with a wide and soft shoulder lining. Fans of carrying luggage in their hands or on wheels should pay attention to the bag with a retractable (telescopic) handle – it can be fixed in several positions.


How to make a “cold accumulator” for a thermos bag

It can maintain a low temperature in a travel refrigerator for 8-24 hours. To make such a thing, you will need:

  • one or more plastic bottles;
  • salt;
  • water.


Salt is poured into the bottle to form a 2 cm layer at the bottom, and the container is filled with 9/10 water (6 tablespoons per 1 liter of water). If this parameter is exceeded, frozen liquid may break the bottle. The lid should be closed as tightly as possible and the container is shaken until the salt is completely dissolved. Put the bottle in the freezer and get the brand new “cold accumulator” after 12 hours.


Select the size of the bottle at your discretion. It all depends on the estimated volume of the travel refrigerator and the total mass of the product. For trips over short distances – to the cottage or on a picnic – a 1-liter bottle is suitable, and for a long gathering in the fresh air, it is better to equip the bag with several 1-liter bottles, evenly distributing them across the “refrigerator”.


In order for the drinks, you prepared to remain invigoratingly cool, clad the outside of the bag with a heat-reflecting screen – foil – and there you go, you’re ready for your summer outdoor fun.


Step-by-step instruction

While the solution of the “cold accumulator” freezes, you can begin to make the remaining parts. First, cut out the inner lining of the product from the insulation. The result should look kind of like a cross, the sides of which exactly coincide with the walls of the bag.


One side of the cross is left longer than the rest to cover the lid, and the center should be the same size as the bottom. The foil side of the plastic film must be turned facing you or whoever is working on it. Stick the adhesive tape in such a way that there are no gaps between the insulation.


You need to properly cut the insulation so that it easily fits into the bag. To do this, the pattern of the plastic film should be 5-7 cm smaller than the size of the bag.


The sides of the cross of the film are fixed with a wide tape on the outside and inside. Do not save on adhesive tape – it should be enough for all corners and sides of the pattern.


For maximum tightness, it is necessary that the insulation rests reliably on the walls of the bag – that way it will not release cold out and let heat in. This ensures the safety of the products even on the hottest day.


Next, you need to carefully place the insulation pattern in the bag. Scotch tape will help with fixing the joints of the inner surface of the film and the edge of the insulation. The whole work will take 1-2 hours.


The soft surface of the foamed polyethylene allows you to transport not only meat, vegetables, pastries, but also drinks in glass containers. However, it is advisable to wrap them in newspapers for greater safety.


Conclusion

A travel refrigerator is a device that lets you enjoy fresh food while on a long trip. It is easy to make. You just need a set of necessary tools and skills and some time for this DIY project.


How To Choose The Best Commercial Refrigerator

Do you need to defrost the fridge before moving?

Does your fridge have food stuck to it, causing moisture to condense on the floor? The more often you clean your fridge, the better your freezer will perform.

Frightened of air leakage? See how to control air leaks.

Why is my freezer so hot? How can I cool the temperature?

Good thermometers are a must to make sure you are cooking safe food. A cheap oven thermometer that reads as low as 155 degrees, or a redo’s egg timer that reads 11.

Aaron from RefrigeratorFAQ.com stated that the fridge should be cold to the touch. If the refrigerator is not already at the target temperature, check the freezer compartment. If the freezer compartment is not the required temperature, defrost it by running water through the system to bring the temperature up to the target temperature. If the system is not warm enough and the freezer is not defrosted, install a thermostat to control the temperature.

Often people will remove their fridge, close it and leave it to defrost overnight and this is the start of your freeze-drying. You need to be very aware of any condensation and small particles on your freezer, as these could cause the freezer to freeze.

Get the car out of the garage, or leave it outside, in case the power goes out.

Make sure your fridge is not installed indoors. This is because the outside temperature can decrease dramatically as the fridge door is opened.

How can I defrost my fridge quickly?

To bring your freezer to a temperature of 0 degrees Fahrenheit, you may need to turn your fridge on or off while it is cold.

To defrost your refrigerator quickly, connect the freezer cord to your house wiring. For example, if your house wiring is in “Two-Phase,” your refrigerator’s cord will be connected to the two-phase wiring. Turn off your refrigerator, unplug the cord and allow it to cool for several minutes. Plug your refrigerator’s cord into a power strip, then turn on the power.

For convenience, most commercial defrosting systems will allow you to select a temperature that is low enough that the refrigerator will not defrost and turn back on.

Some commercial systems may have a feature that allows you to dial in a specific time so that your refrigerator will defrost. Depending on your situation, the options for a commercially defrosting system will vary.

Setting up and using a commercial defrosting system may not be completely intuitive and does not always work, but if the time interval is good enough.


While you can buy a microwave-safe container of water from a grocery store, that’s not always an option. And the high temperatures inside a microwave can actually make the water too hot to use, leaving your food open to mold and bacteria.

Instead, a fast and easy way to defrost your fridge is to use the “frozen-food disposal” method. Microwave it for 15 seconds and then let it cool for 10 minutes. It’s that simple.

How do you transport a fridge?

Best explained via the dissection and inspection of a refrigerator in its integrated unit.

Note: the fridge has internal thermal mass and can be transported with a combination of a bag and ice crusher.

The division of a fridge from the space within which it is installed is typically referred to as a shipping container.

Example 1: A factory relies on its “mass storage” in warehouses for delivery by a field truck. All deliveries are made in insulated containers and the container is loaded by hand.

How do you slide a fridge?

The function of the sliding door can be dramatically improved by the incorporation of this antenna module and design. On the other hand, mounting an un-shielded coax insert would have already resulted in better overall performance. Further, no antenna is more ubiquitous and flexible than an integrated crystal controlled oscillator. Furthermore, there are various major manufacturers and component names that are well-known in the radio industry. The industry-savvy electronics lovers have an in-depth knowledge of the details that need to be considered. That is why we have obtained a series of 10 building test boards to service.

You slide it like you slide a puzzle. You pick it up from behind and place it down on the raised wall next to it. Slipping a fridge does not just involve dropping it into a cooler, however. Slipping a fridge does not involve turning off the compressor, moving any other water in the fridge, or pushing any tools into the fridge. It requires a little careful planning.

Essentially, you don’t pick it up. You should not have to pick it up if you can help it

How do you clean refrigerator coils?

I don’t have a refrigerator or a freezer, but if I did, I’d use a commercial dishwasher with dry cycle and one hand washing cycle per load to give the same ease as washing in a regular dishwasher. After washing the coil you are then supposed to open the case and wick it out the wires and then drain and refill it with cold water with no paper towels. I doubt if this is even really possible. I like to take off the coils when I do laundry as I think that makes it easier to do.

Good first step. Insert a pin into the opening and push it down until it gets squished down, then repeat. The hot liquid inside the coil should come out first. If this is not the case, try a different pin and use a lighter to light it. If you end up with a really dirty coil, you could try trying to clean it by scraping it with a wire brush. I find that if the lead is not replaced and the wire is extremely contaminated, these are good alternatives.

Make sure your coils are clean (wash with a degreaser or liquid soap and water first, or simply soak them in warm soapy water for a minute or two), and flush them with a hose for 20 to 30 seconds (to flush any crud that may have built up over time).

Can I run the fridge dry?

You may consider doing this if you have small spaces and low ceilings, or you’re trying to improve the cooling effectiveness of your system. This works for people with well-insulated homes.